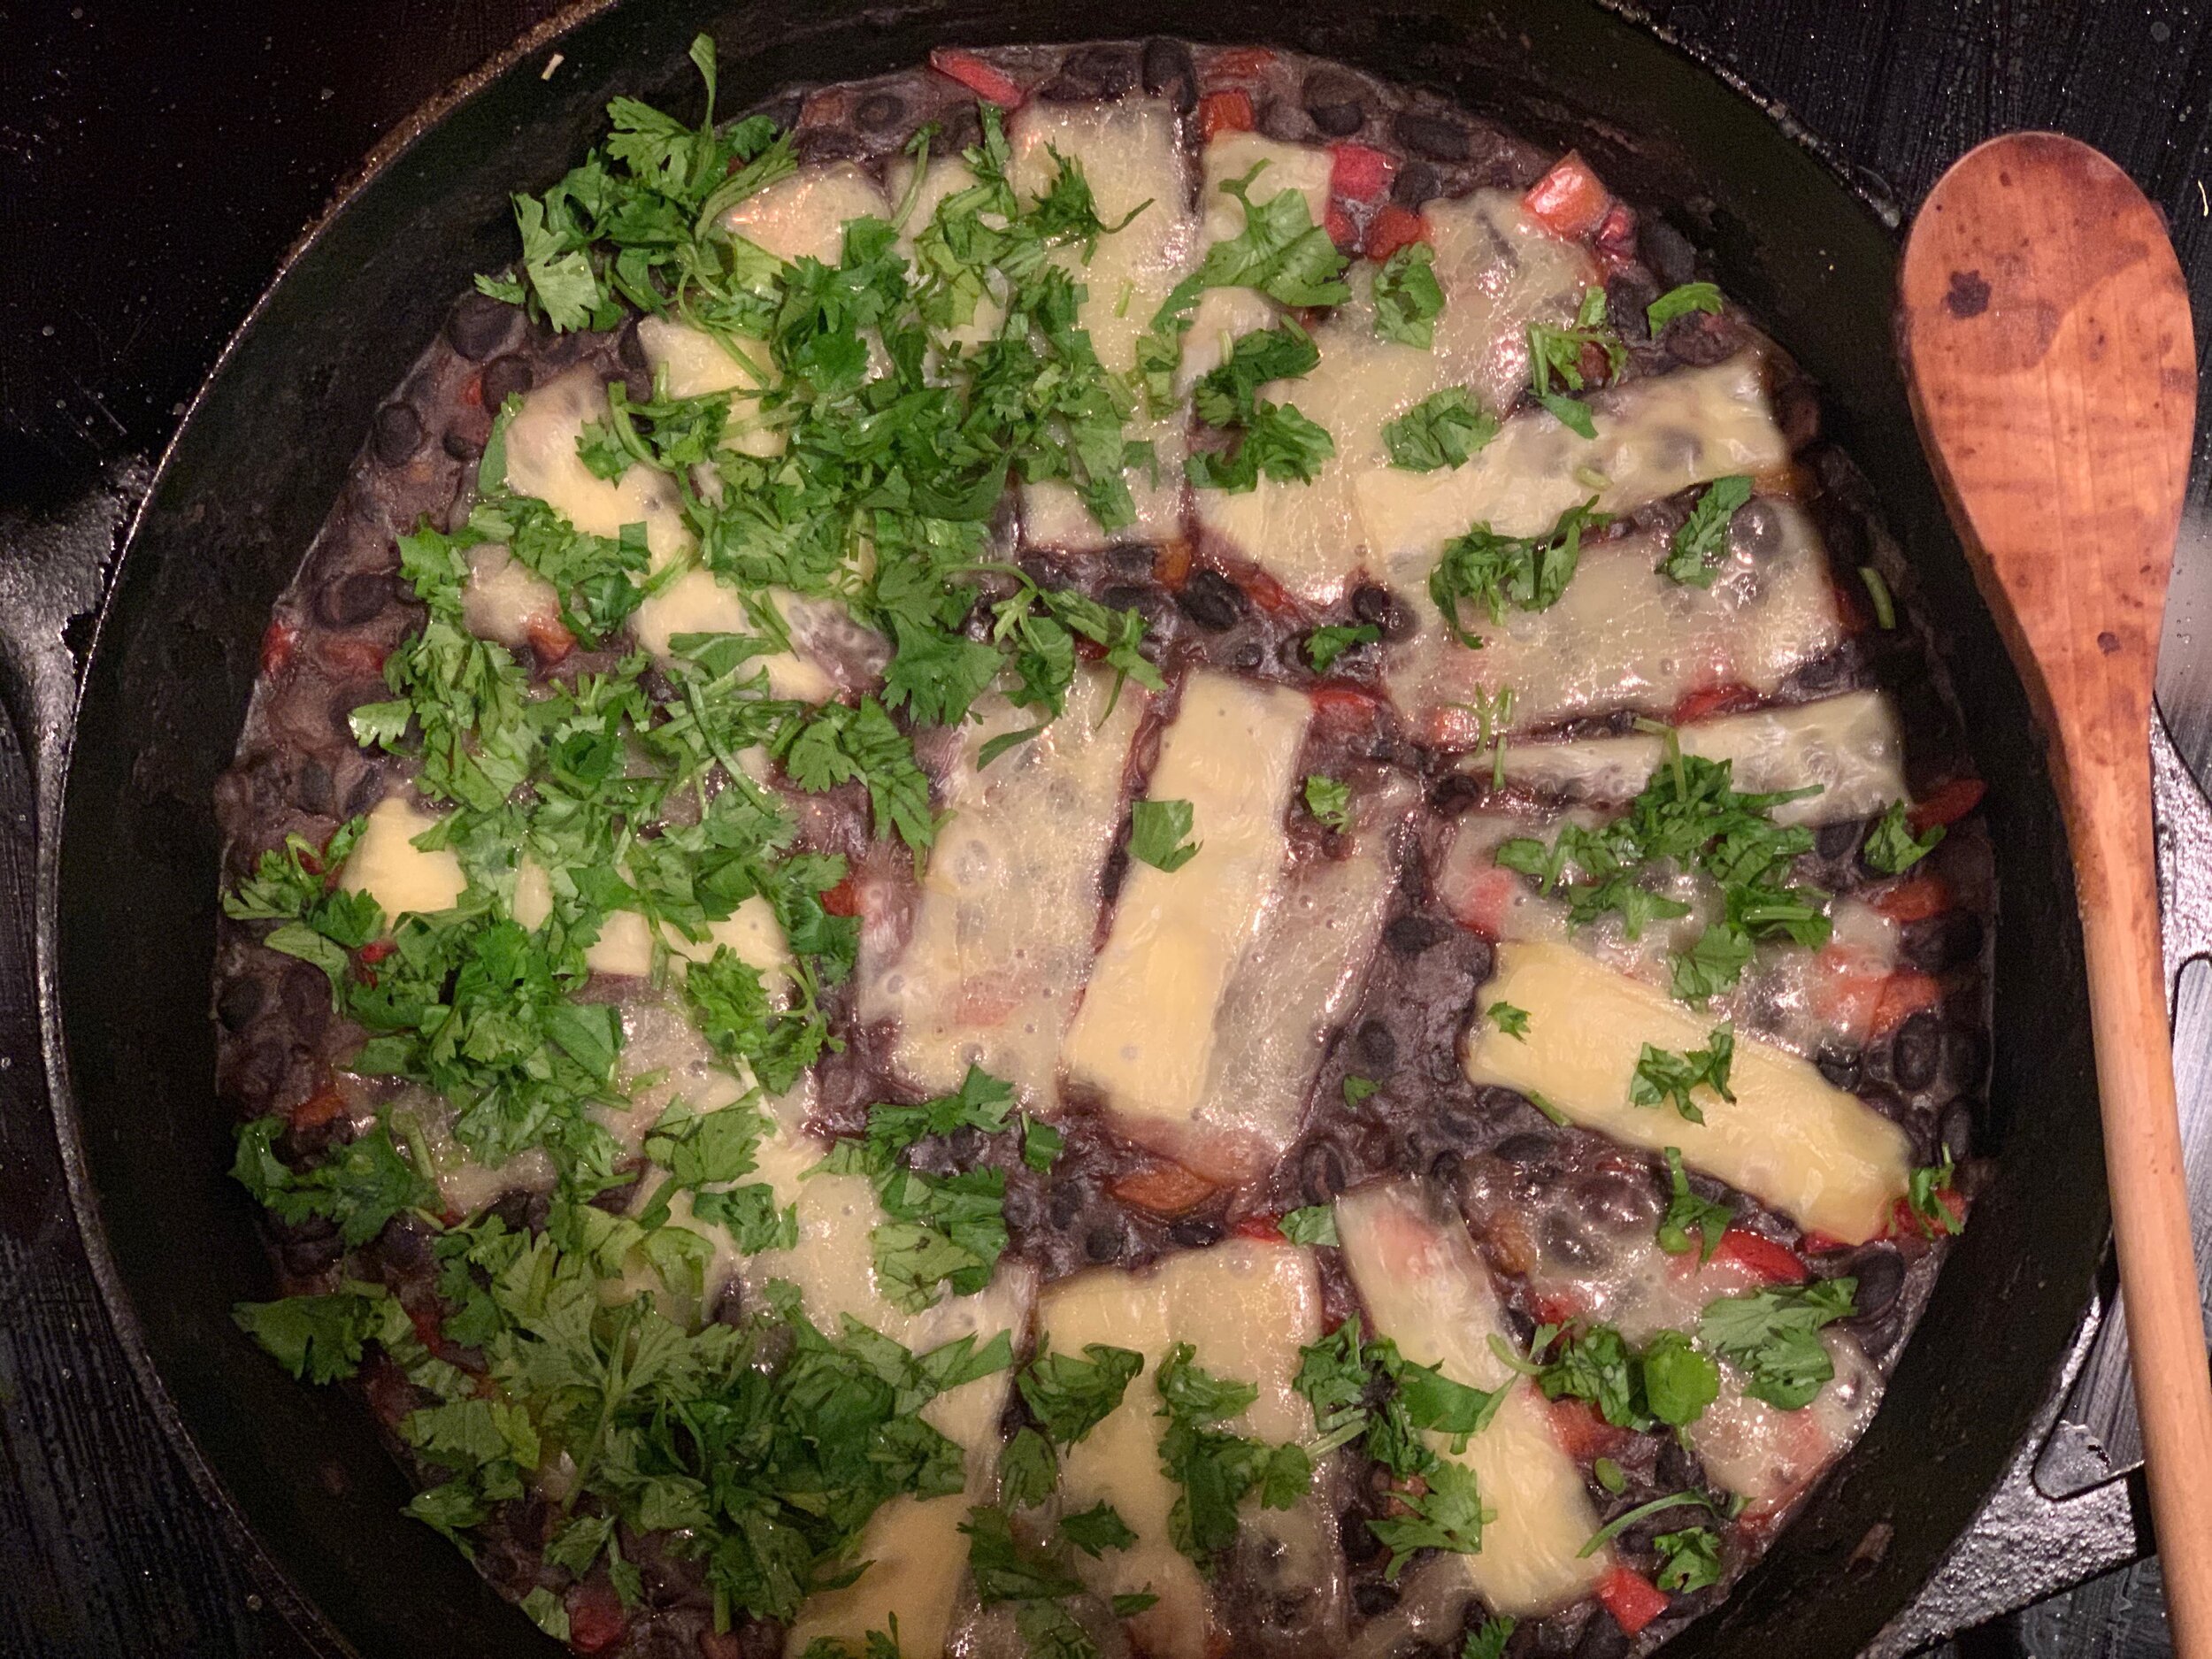
Black Bean Frittata

IMG_6148.jpg

This is one of my favorite quick and simple dinners that I often make on a weeknight when I’m pressed for time. It’s similar to a classic frittata, except that black beans are used instead of eggs.

Black beans are high in fiber and an excellent choice for feeding the beneficial bacteria in your gut. Did you know that inhabitants of the Blue Zones eat (on average) one cup of legumes a day? More and more research is showing that gut health is linked to nearly every aspect of our physical health and meals like this are a great way to boost your fiber intake.

This dish pairs well with salad (particularly a salad that includes cabbage and cilantro), avocado, mango, and heirloom tomatoes. I also like to serve it with some salsa and/or hot sauce. It makes for a flavorful taco filling as well, along with some guacamole or sliced avocado.

However you serve it, I hope you enjoy :)

~~~~~

Black Bean Frittata

Notes: You can certainly use a different color of bell pepper depending on what you have, but I do think that red/orange/yellow ones taste better in this recipe than green because they’re a bit sweeter. Also please note that you do NOT drain the beans here. You will pour in the entire can, liquid and all. For the cheese, I usually do a combination of cheddar and mozzarella. Also, I never measure it - just grate or slice a bit and throw it on.

Good glug of olive oil
One medium yellow onion, chopped
One red bell pepper, diced
29-oz can black beans, do NOT drain
1 1/2 teaspoons sea salt
1 1/4 teaspoons ground cumin
1 teaspoon granulated garlic
1/2 cup (approximately) shredded or sliced mozzarella and/or cheddar cheese (or whatever you prefer)

To serve:
Chopped cilantro

Heat a large skillet over medium heat. I use my 12-inch cast iron skillet for this. Add the onion and sauté for 8-10 minutes until softened, stirring every minute or so. Add the diced bell pepper and sauté for another minute or two. Then pour in the entire can of black beans, liquid and all, plus add the sea salt, ground cumin and granulated garlic. Stir and let the mixture come to a simmer. Once simmering, cook for approximately another 10 minutes (maybe a bit more) to let the black beans thicken, stirring occasionally. I like to scrape the bottom of the pan with my spatula during this step.

When the beans have thickened, I use the flat part of my spatula to level the top before adding the cheese. Once flat, grate your cheese over the top, or place some slices in a nice pattern to mostly cover the beans.

Scatter some chopped cilantro over the top just before serving to make it pretty :)

Serves 6-8

Print Friendly and PDF

Quick Taco Beans

IMG_5365.jpg

This is a super quick way to transform a can of beans into lunch or dinner. In 15 minutes you’ll have a saucepan of stewy, flavorful beans ready for tacos, a taco plate or a Mexican-style salad. I love the flavor and texture of these beans, and though I usually use pinto beans for this recipe, it also works well with black beans, great northern, navy beans, etc. Any bean that you could envision in a taco would work for this. The longer you simmer, the thicker the beans will be. They will thicken a bit when they cool as well.

While the beans are simmering, I quickly shred some cabbage, chop a bit of cilantro, shred some cheese, chop an avocado and pull out some tortillas, hot sauce and cultured radishes. These ingredients, along with the beans, will make everyone in my family happy. My kids invariably eat bean-cheese-avocado tacos (pictured below), and Mark and I make plates with beans, cheese, cabbage sprinkled with sea salt and drizzled with olive oil, cilantro, avocado, radishes and hot sauce. I am never disappointed by this meal.

I hope you find this simple recipe useful, and would love to hear of any other ways you eat these beans.

IMG_5369.jpg

~~~~~

Quick Taco Beans

Notes: You do not drain the beans for this preparation. Just open the can and pour ‘em in. Also, I’m starting with a can of UNSALTED beans. If your beans are salted, I would add only the cumin and garlic granules at the beginning, then simmer, then salt to taste as needed at the end.

Good glug of olive oil
14.5 oz can pinto beans (or black, great northern, etc) - DON’T DRAIN!
1/2 teaspoon sea salt (see note)
1/2 teaspoon ground cumin
1/4 teaspoon garlic granules

Put a small / medium saucepan over medium heat and pour in a good glug of olive oil. Add the beans (liquid and all) as well as the sea salt, cumin and garlic granules. Heat the beans until they are gently bubbling and simmer for 10-15 minutes stirring occasionally (you may want to turn the heat down to medium-low depending on your stove), until the beans release some of their starch and the liquid thickens and becomes creamy.

Use for tacos, Mexican-inspired salads or with whatever else you have in your fridge :) 

Print Friendly and PDF

Gluten-Free & Vegan Waffles

IMG_5212.jpg

This is our house waffle recipe. In addition to making them vegan, I’ve optimized the fiber and minimized the simple starch as much as I can while still making a tasty waffle. I love the dark, nutty character of these. Because they don’t have any sweetener, they can be eaten sweet or savory. I usually go savory with smashed avocado, some homemade sauerkraut and maybe a fried egg. But pictured above is what I call the Daniel Special: with sliced banana, shaved dark chocolate and a drizzle of maple syrup. And I have to say, it’s pretty darn good.

Teff flour is one of my faves. It’s high in fiber, iron, and magnesium and also contains some calcium and potassium. It’s great for feeding kids and it makes beautiful pancakes as well. Amaranth flour also contains a decent amount of iron and calcium, so I feel really good about serving these waffles for breakfast (even with the shaved chocolate :).

If you come up with other ways to enjoy these, I’d love to hear about it!

~~~~~

Gluten-Free & Vegan Waffles

Notes: You can play around with the ratio of teff to amaranth flour, as long as the total is 205 grams. As for milk, I use whatever combination of nut milk and coconut milk we have in the fridge. You can use whatever you have at home, though if you use cow milk these obviously won’t be vegan. Also… Waffle irons vary from one to the next. I previously had a waffle iron that made very large, thick waffles and I found that this batter needed less milk (and even then I didn’t love the way the waffles came out). Now I have this simple waffle iron, which I love, and this ratio is perfect for it. I like to cook these waffles on the slightly darker side.

Recipe updated 12/24/2022

Dry Ingredients:
110 grams teff flour
95 grams amaranth flour (I use sprouted)
30 grams tapioca OR arrowroot starch (sometimes called flour or powder)
1 teaspoon sea salt
1 tablespoon baking powder

Wet Ingredients:
2 tablespoons ground flax seed
1/4 cup hot water
1/4 cup olive oil
1 2/3 cups nut milk and/or soy milk

Measure out and whisk the dry ingredients in a bowl. In another mixing bowl, add the ground flax seeds and cover with the hot water. Whisk and let this mixture sit for a couple minutes to thicken, then add the olive oil and milk and whisk again until emulsified. Add the dry ingredients to the wet, mix well and cook your waffles according to the instructions on your waffle iron.

On our waffle iron this recipe makes 3 large, round, Belgian-style waffles. We usually eat them 1/4 at a time (and my kids are still small enough to do this, although Daniel is currently up to 3 waffle quarters with all the fixings) but depending on how many you’re feeding, you may want to scale it up.

These refrigerate well and can easily be reheated in a toaster oven (I imagine a regular toaster would work as well).

Enjoy!!

Print Friendly and PDF